The Short Answer
You don't need Photoshop skills or a professional restoration service to bring an old family photo back to life. An AI photo restoration tool can repair scratches, tears, and fading, and even add color to black-and-white photos, directly in your browser.
PixExtender's Photo Restoration does this from a single upload, with free trial credits and no software to install. Here's exactly what it fixes and how to use it.
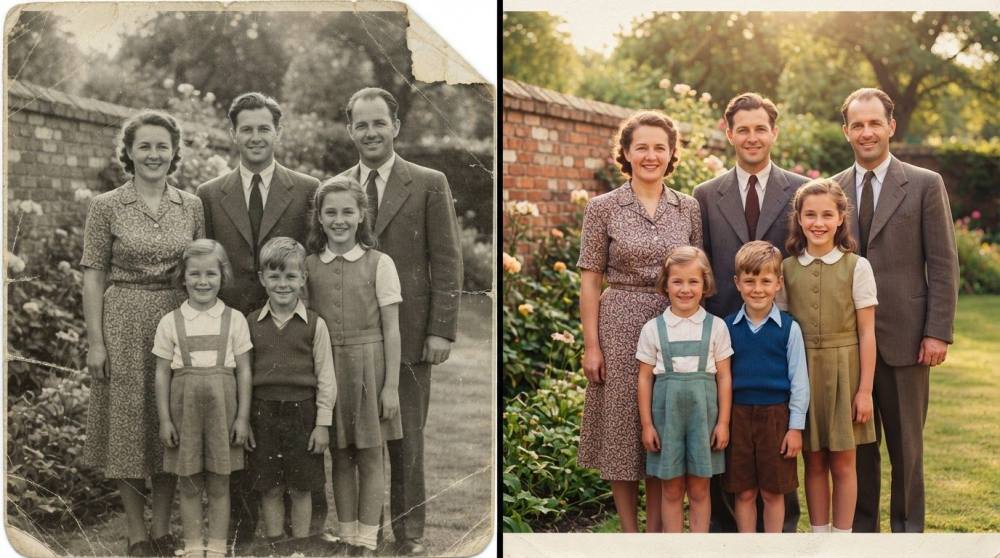
What "Restoring" an Old Photo Actually Fixes
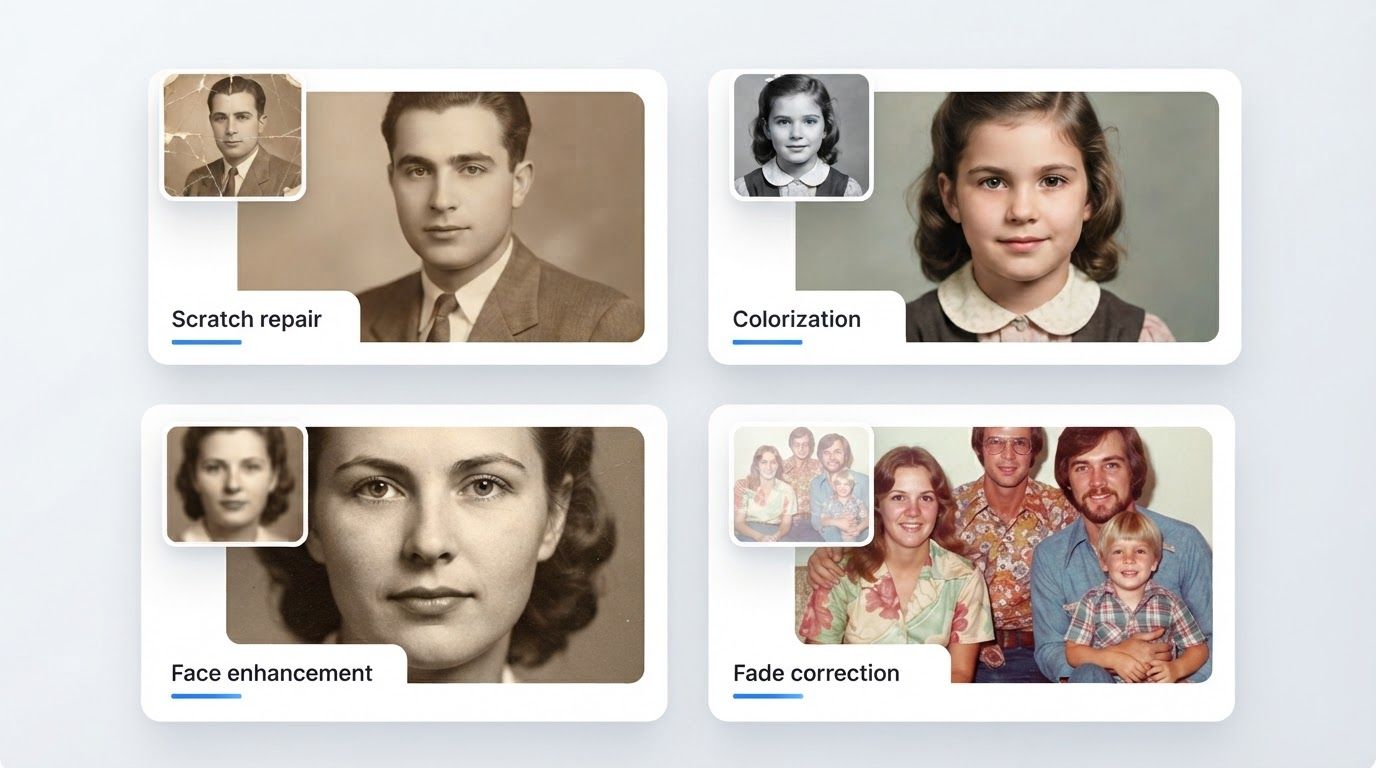
Old and damaged photos tend to suffer from a specific set of problems, and AI restoration is built to address each one:
- Scratches, tears, and creases — physical damage from decades of handling and storage
- Fading and discoloration — colors and contrast that have degraded with age
- Missing or torn-away chunks — pieces of the photo that are simply gone
- Black-and-white photos — that could be brought into color
Under the hood, this combines two techniques: inpainting, which reconstructs missing or damaged regions by understanding the surrounding content, and colorization, which predicts realistic, plausible color for grayscale images. It's the same family of technology as the "damage repair" pass in our Upscale vs Enhance vs Extend vs Restore guide, applied specifically to old photos.
Before You Start: Getting a Good Scan or Photo of the Original
Restoration quality depends heavily on what you feed it. A few minutes of care here pays off:
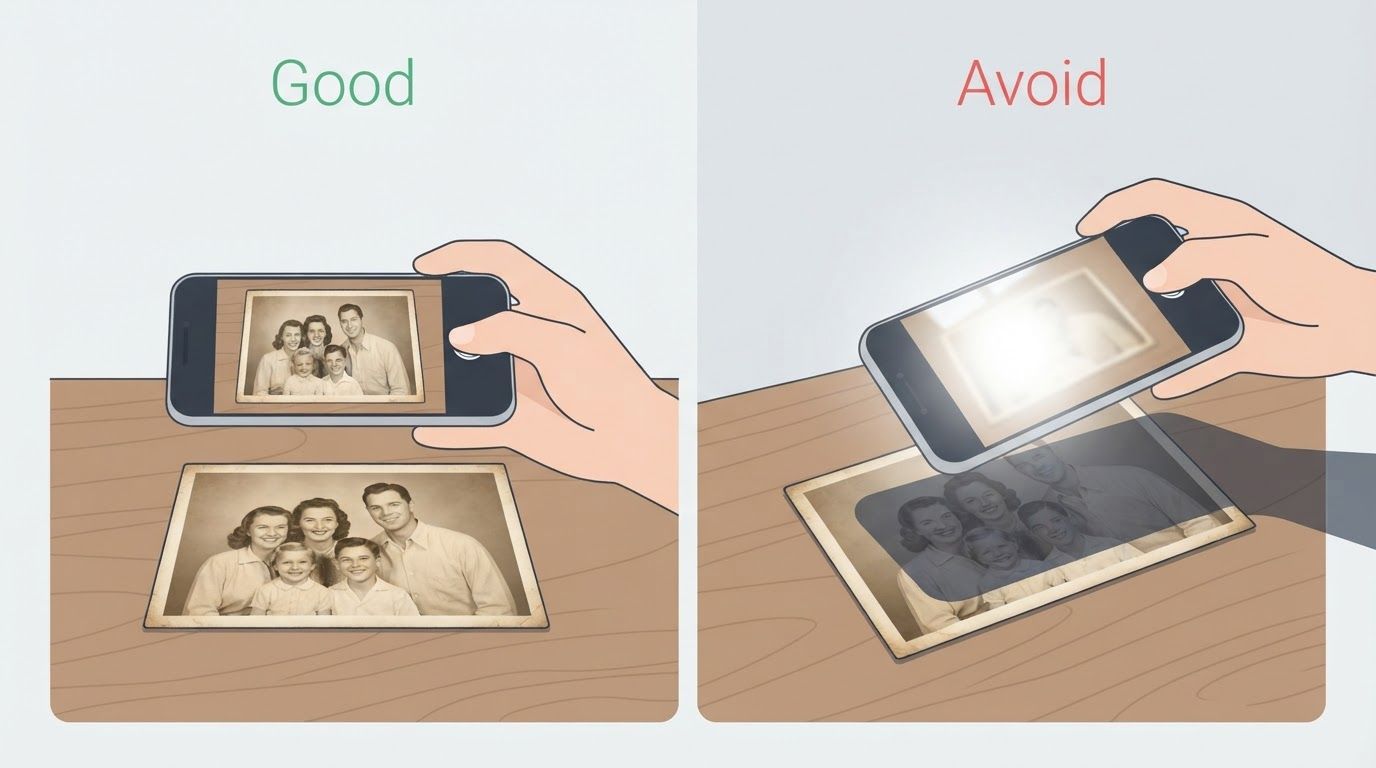
- Scan if you can, ideally at 300+ DPI. If you're photographing the print instead, use even, diffused light and avoid glare or shadows across the surface.
- Capture the whole photo, including damaged edges—don't pre-crop out torn corners or borders; the AI needs the full context to repair convincingly.
- Keep the photo flat to avoid warping or blur from an angled shot.
- Avoid heavy pre-editing. Upload the rawest version you have; let the restoration tool do the repair work.
Step-by-Step: How to Restore an Old Photo with PixExtender
Here's the full process using PixExtender's Photo Restoration:
Step 1: Upload Your Photo
Go to PixExtender, open Photo Restoration, and upload your scan or photo (JPG, PNG, or WEBP).
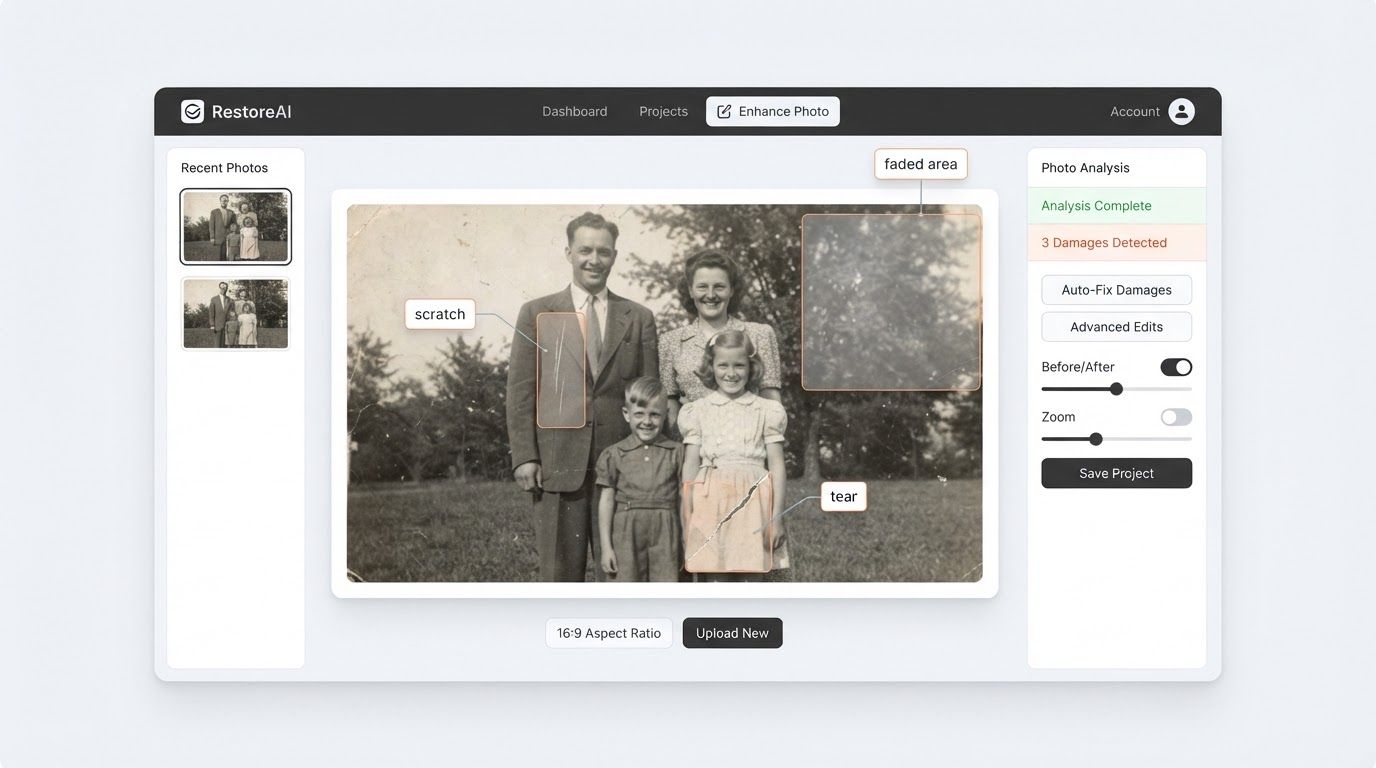
Step 2: Let the AI Detect Damage
The tool automatically identifies scratches, tears, fading, and—if the photo is black-and-white—prepares it for colorization.
Step 3: Generate
Click "Restore". Processing takes just a few seconds.
Step 4: Download
Compare the restored version to the original, then download your finished photo.
Total time: under a minute per photo.
Restoration vs Enhancement vs Upscaling: Which Do Old Photos Need?
Most old photos benefit from more than one step, and the order matters:
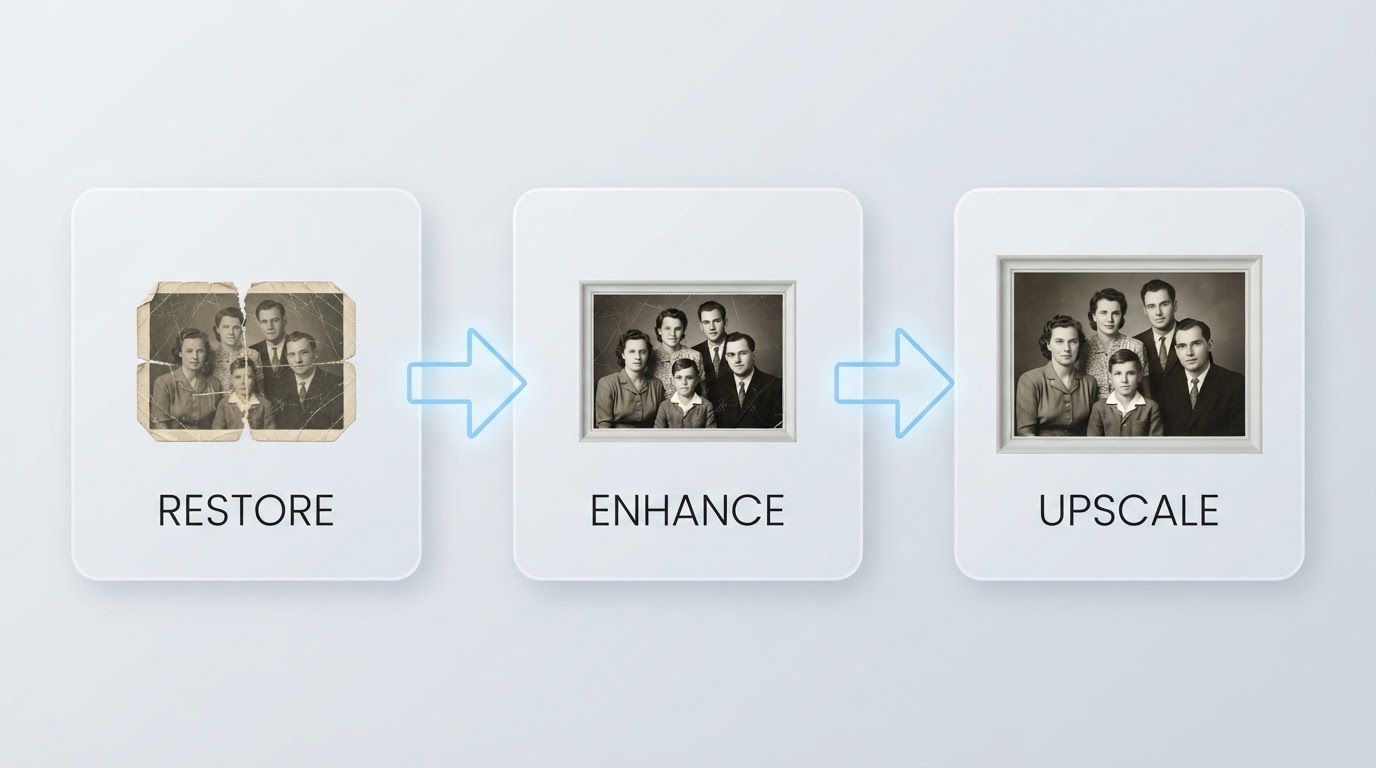
- Restore first — repair the physical damage and colorize before anything else, so later steps build on a fixed foundation rather than baking in the damage.
- Enhance next — clean up remaining noise and softness. See How to Make a Blurry Photo Clear if the restored photo still looks soft.
- Upscale last, if you want a larger print or a higher-resolution copy. See How to Make an Image Bigger Without Losing Quality.
Because PixExtender offers restoration, enhancement, and upscaling in one place, you can run an old photo through this entire pipeline—Photo Restoration → Photo Enhancer → Image Upscaler—without re-uploading between different apps. The full reasoning behind this order is in Upscale vs Enhance vs Extend vs Restore.
Pro Tips for the Best Restoration Results
- Start from the highest-resolution scan you have. Restoration reconstructs damaged areas using the surrounding detail, so more surrounding detail means a more convincing repair.
- Set realistic expectations for major damage. AI restoration is excellent at texture, background, and gradual damage, but for a large missing piece over a face or key subject, results are a best-effort reconstruction, not a guaranteed exact recovery.
- Colorization is an educated guess. For black-and-white photos, added color reflects plausible, realistic tones—not necessarily the exact original colors, since that information no longer exists in a grayscale image.
- Restore before you enhance or upscale, not after—repairing damage on a clean, unscaled image gives the AI the clearest signal to work with.
Frequently Asked Questions
Is it really free to restore old photos with AI?
Yes. PixExtender's Photo Restoration gives you free trial credits with no credit card required, so you can restore a photo and see the result before committing to anything.
Can AI restoration fix badly torn or missing pieces of a photo?
It can reconstruct missing or damaged areas by inferring from the surrounding content, and it does well on backgrounds, textures, and moderate damage. For very large missing sections—especially over faces or important details—treat the result as a strong best-effort repair rather than a certain recovery of the original.
Does AI restoration accurately colorize black-and-white photos?
It produces realistic, plausible colors based on what similar scenes and objects typically look like, but it can't know the exact original colors of a grayscale photo with certainty. The results are usually natural-looking and a major improvement over black-and-white, even if not historically exact.
Do I need Photoshop skills to restore old family photos?
No. The entire process is upload, wait a few seconds, and download—no layers, masking, or manual retouching required.
Should I restore or enhance an old photo first?
Restore first. Repairing scratches, tears, and fading gives you a clean base image; enhancing afterward polishes remaining noise or softness on top of that repaired photo. Doing it in the other order means you'd be enhancing damage that restoration hasn't fixed yet. See the full multi-tool workflow in Upscale vs Enhance vs Extend vs Restore.
Can I restore photos taken with my phone of a printed photo?
Yes, as long as the shot is reasonably flat, well-lit, and free of glare. A clean phone photo of a printed picture works fine as a starting point—just avoid harsh shadows or reflections across the surface.
Bring Your Old Photos Back to Life
Faded, scratched, torn, or black-and-white—your old photos don't have to stay that way. Upload one and see the restoration for yourself:
Start free with PixExtender's Photo Restoration → PixExtender.com
Want to know how restoration fits with the other tools? Read the full guide: Upscale vs Enhance vs Extend vs Restore.