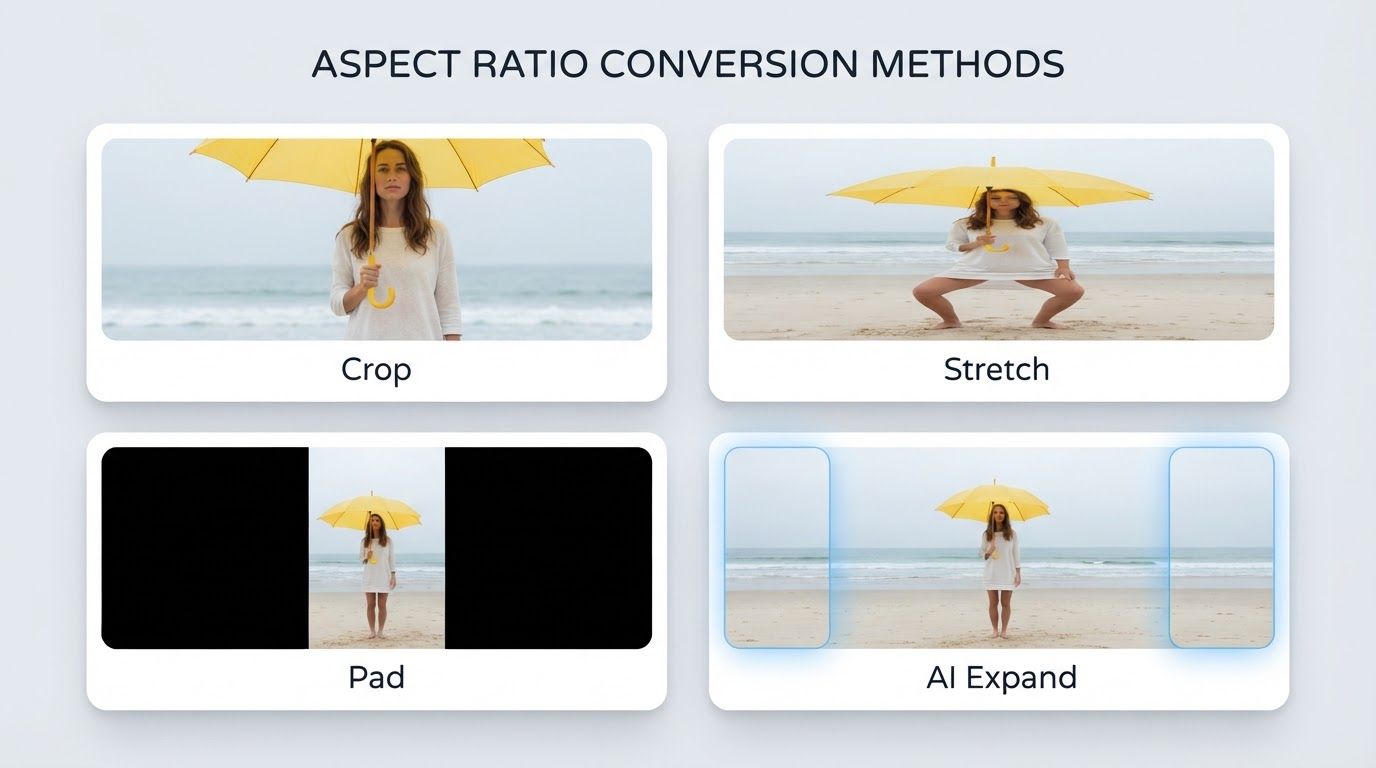
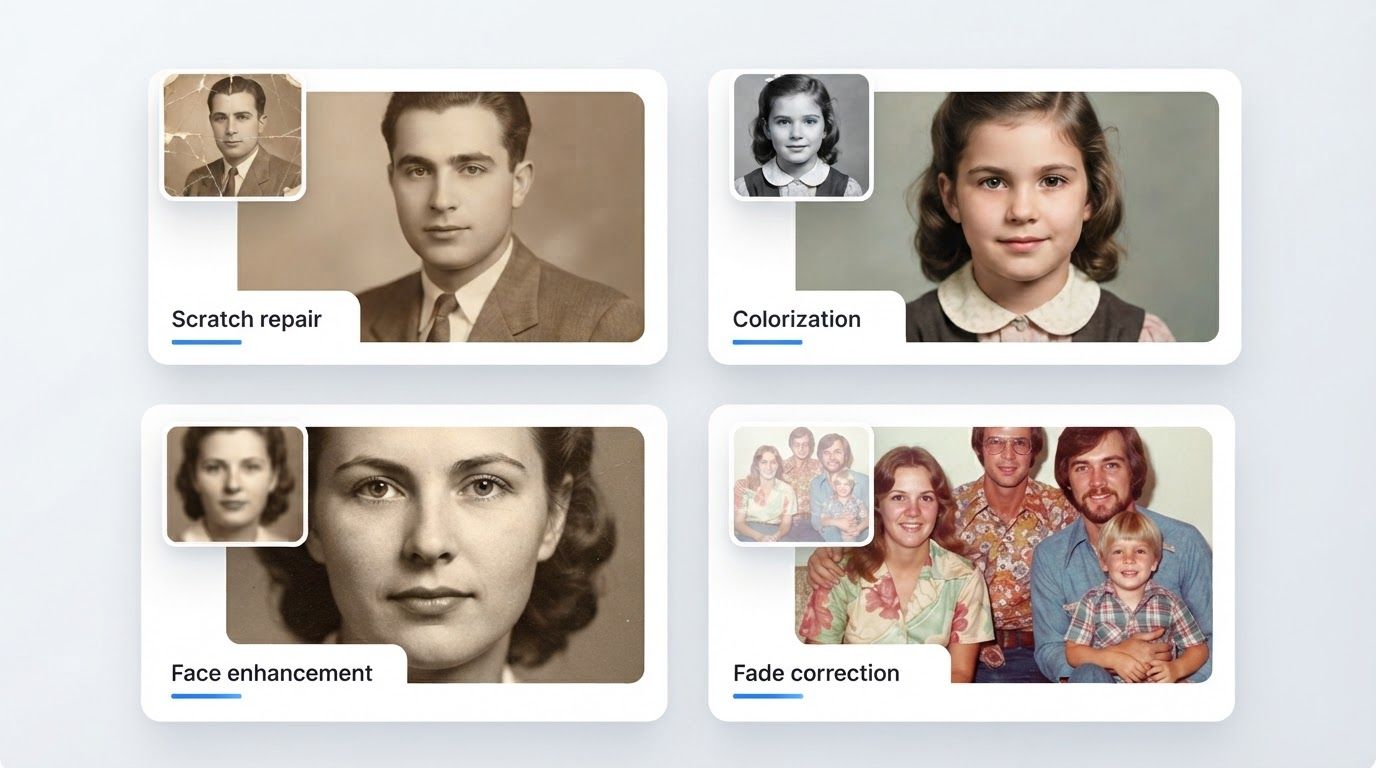
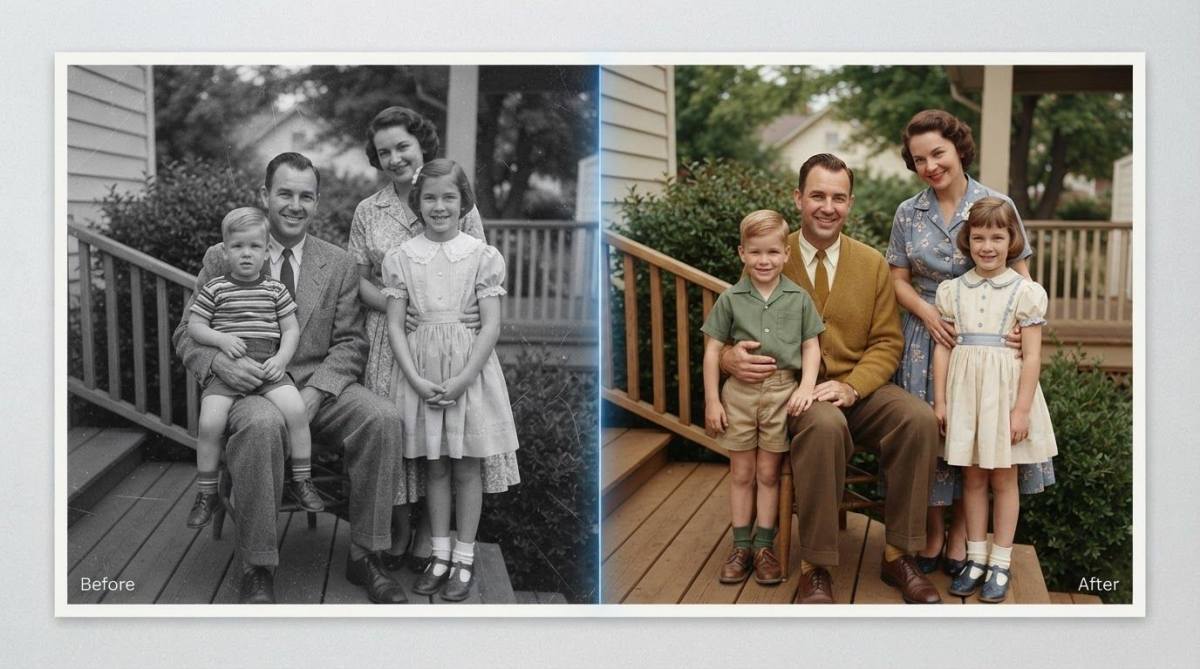
Portrait vs landscape is one of the first decisions you make before pressing the shutter, and it shapes everything that follows: how your subject looks, how much of the scene fits, and where the image can be published. This guide breaks down the difference, when to use each orientation, and how to fix orientation problems in editing without cutting into your subject.
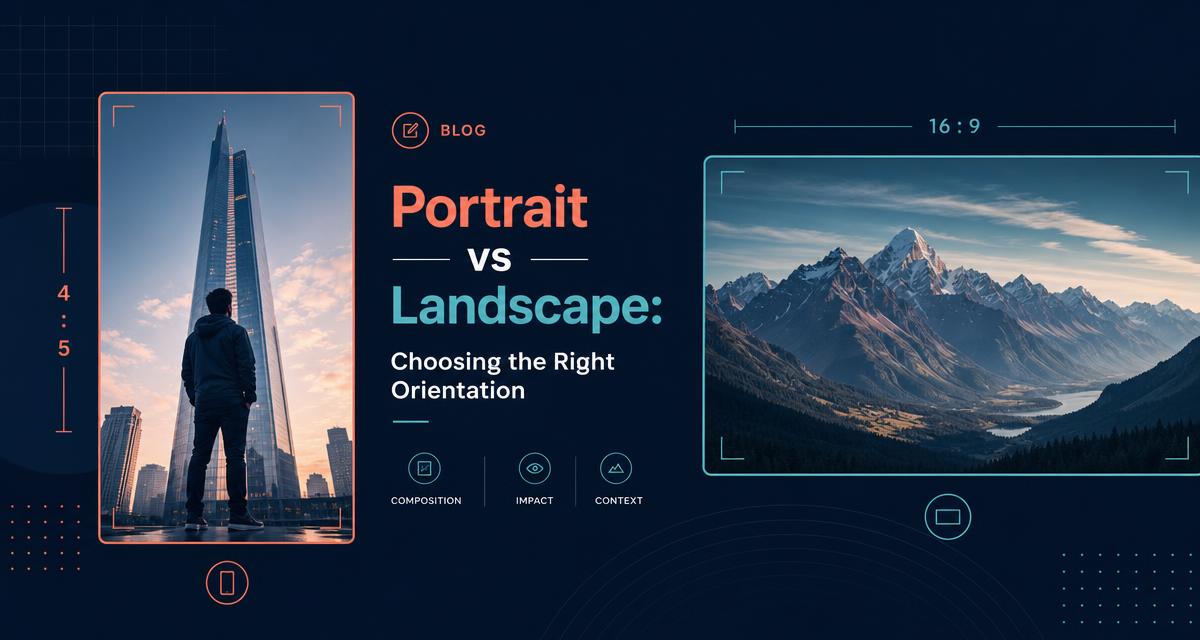
The Core Difference in Image Orientation
The difference between portrait and landscape comes down to how you position the frame in relation to your subject. This choice affects the shape of your photo, how the aspect ratio works, and how your camera sensor captures the scene.
What Defines a Portrait Format
Portrait orientation means your image is taller than it is wide. You get this vertical format by holding your camera or phone upright.
This layout works well for subjects with height, like people, buildings, or trees. It draws the eye up and down the frame instead of side to side.
Most smartphones default to portrait orientation when you open the camera app. You'll also see this format used often on social media, since many apps display images in a vertical scroll. If you shoot for Instagram, our guide to resizing images for Instagram covers the exact vertical dimensions each placement needs.
What Defines a Landscape Format
Landscape orientation flips the frame so it's wider than it is tall. You create this horizontal layout by turning your camera sideways.
This format suits scenes that stretch out across a wide area, such as mountains, fields, or group photos. It gives you more room to show what's happening on the left and right sides of the image.
Landscape format is common on TV screens, desktop monitors, and printed materials like brochures. If you're shooting something with strong horizontal lines, this orientation usually gives you a better result.
How Aspect Ratio Relates to Orientation
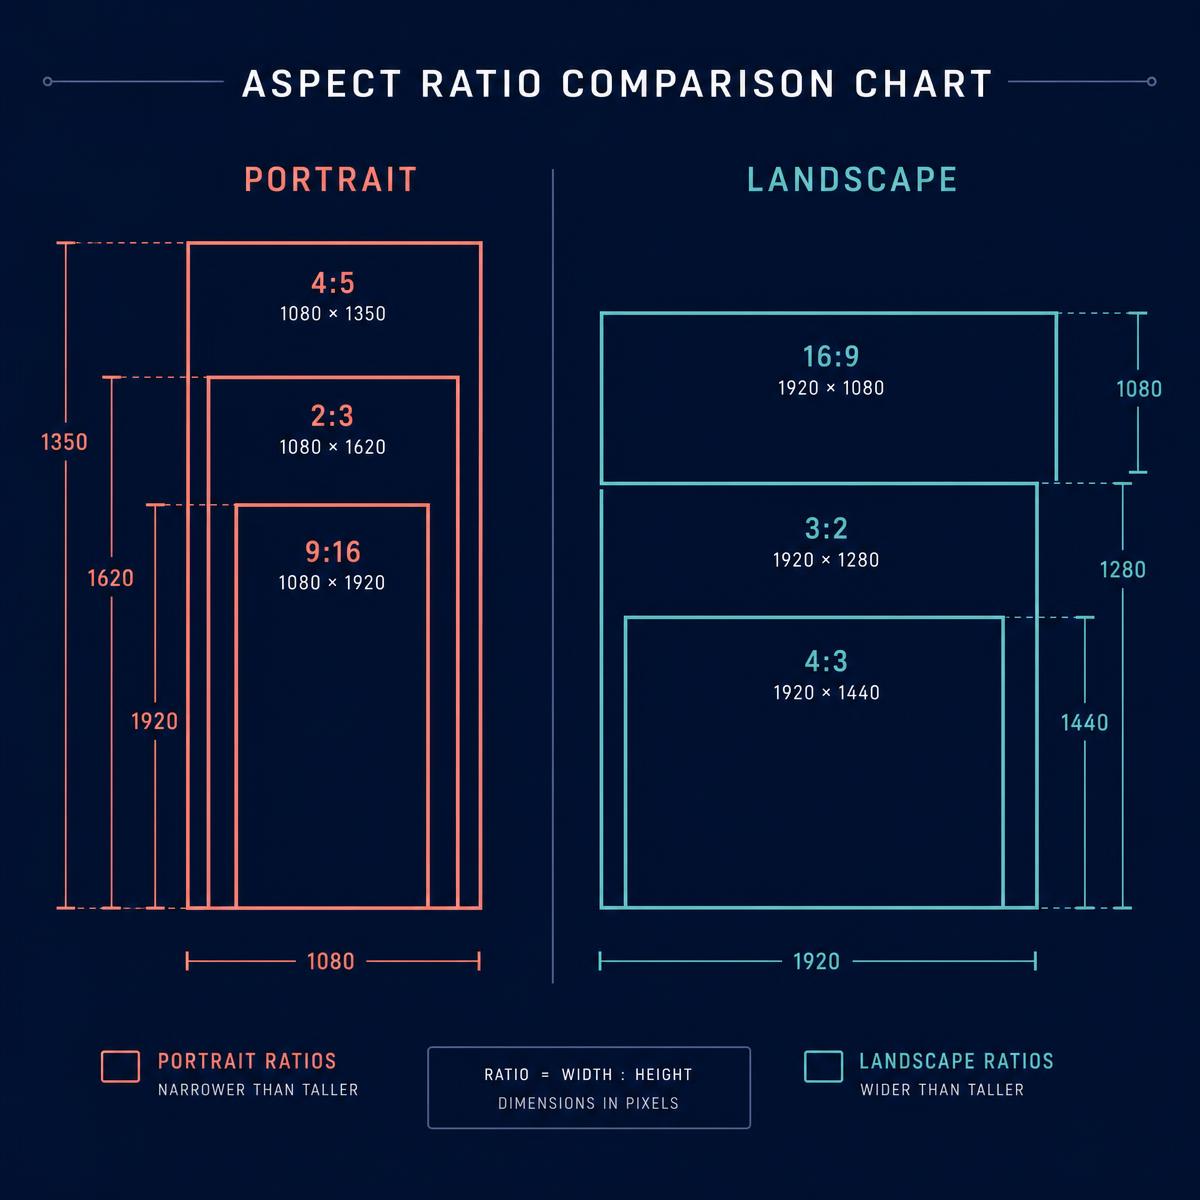
Your aspect ratio is the relationship between the width and height of your image. Common ratios include 4:3, 3:2, and 16:9, and each one can work in either portrait or landscape orientation.
Your camera sensor captures images in a fixed aspect ratio, but you decide the orientation by how you hold the camera. For example, a 16:9 ratio in landscape mode gives you a wide, cinematic frame, while the same ratio in portrait mode creates a tall, narrow image.
Here's how orientation and aspect ratio work together:
| Orientation | Common Aspect Ratios | Typical Use |
|---|---|---|
| Portrait | 4:5, 2:3, 9:16 | Social media, phone screens, headshots |
| Landscape | 16:9, 3:2, 4:3 | TV screens, desktop banners, wide scenes |
Knowing your aspect ratio ahead of time helps you plan your shot and avoid cropping issues later. When you need one image in several ratios, an AI image extender can widen or heighten the original instead of forcing a crop.
How Frame Direction Changes Composition
Your choice of camera orientation shapes where the eye lands first, how much of a scene fits in the frame, and how strong your composition feels. Simple changes to framing and cropping can turn a flat photo into one with clear visual emphasis and a defined sense of space.
Subject Shape and Framing
The shape of your subject should guide your orientation choice. Tall or narrow subjects, like a person standing or a skyscraper, fit naturally into a vertical frame because portrait orientation emphasizes height.
Wide subjects, like a mountain range or a group of people standing side by side, call for a horizontal frame. Landscape orientation gives you more room on the sides, so you can fit more of the scene without cutting off important details.
Cropping after the shot can fix small framing mistakes, but it works best when you start with the right orientation in mind. Think about the subject's shape before you raise the camera.
Using the Rule of Thirds in Each Format
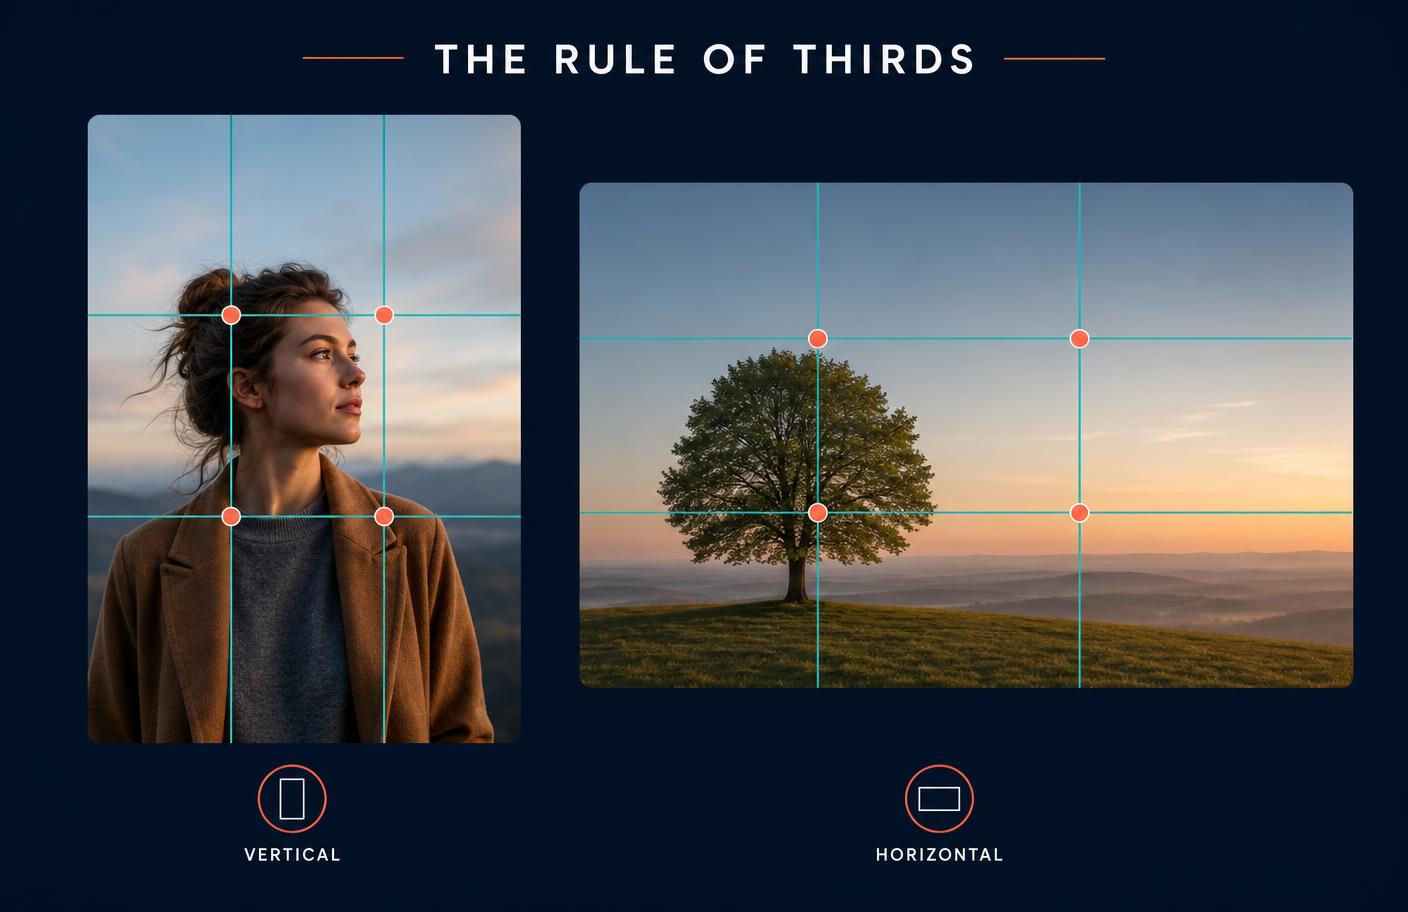
The rule of thirds works in both orientations, but you apply it differently depending on the frame direction. In landscape shots, you place your subject along one of the vertical thirds lines, leaving open space on either side for context.
In portrait shots, the horizontal thirds lines matter more. Placing a subject's eyes or face along the upper third works well for close-ups and portraits, since it keeps the focus near the top of the frame without feeling cramped.
Either way, the grid gives you a starting point, not a strict rule. Adjust based on what feels balanced in your specific shot.
Leading Lines, Negative Space, and Background Elements
Leading lines behave differently based on orientation. Horizontal frames let roads, rivers, or fences stretch across the width, pulling the viewer's eye from one side to the other.
Vertical frames flip this. Staircases, hallways, and tall buildings create leading lines that pull the viewer's gaze upward or downward instead of side to side.
Negative space also shifts with orientation:
- Landscape shots often use open sky or empty ground on the left or right to balance the subject.
- Portrait shots use space above or below the subject to add emotional weight without crowding the frame.
Background elements should support the subject, not compete with it, in either format.
Visual Emphasis and Sense of Space
Frame direction controls how much visual weight your subject carries. Vertical subjects placed in a portrait frame feel bold and commanding, since the narrow width keeps attention locked on them with little else to distract the eye.
A landscape scene, on the other hand, creates a broader sense of space. The wider frame gives context and lets you show relationships between multiple elements, like a person walking through a field or a city skyline at sunset.
Neither format is better for every situation. Your subject and the story you want to tell should decide which orientation gives you the strongest visual emphasis.
Mood, Context, and Visual Storytelling
The way you frame a shot changes how your audience feels about it and what they notice first. Your choice of orientation can pull a viewer close to a subject or push them back to take in the bigger picture.
Creating Intimacy and Emotional Impact
A vertical image naturally draws the eye toward a single subject, which is why portrait composition works so well for close-up shots of people. When you shoot in portrait orientation for individual portraits and headshots, the frame removes distractions and centers attention on facial expressions and small details.
This creates a stronger emotional impact because there's nowhere else for the eye to wander. Portraiture benefits from this tight framing since it highlights posture, eye contact, and mood.
Think about how a headshot feels different from a wide group photo. The vertical format makes the subject feel closer and more personal, which is why it's a common choice for fashion and lifestyle photography.
Showing Scale and Environmental Context
Landscapes need room to breathe, and that's where horizontal framing does its job. Wide shots let you capture more of the scene around your subject, showing how they fit into their surroundings.
This is useful for photographers who want to communicate scale, whether that's a person standing next to a mountain or a building set against a city skyline. Landscape orientation gives you the horizontal space to include background details that add context.
Group photos also benefit from this format since it allows multiple people to fit comfortably without cropping anyone out. The wider frame supports visual storytelling by letting viewers understand not just who is in the photo, but where they are and what's happening around them.
Using Orientation to Direct Viewer Attention
Your choice of orientation acts as a built-in guide for where the viewer looks first. A tall, narrow frame limits the visual field and forces attention toward the main subject, while a wide frame spreads that attention across a larger area.
This matters when you're deciding how to tell a story through a single image. If you want viewers to focus on one detail, a vertical image works better because it narrows the options. If you want to show relationships between multiple elements in a scene, a horizontal frame gives you more room to include supporting details without overwhelming the shot.
When Portrait Orientation Works Best
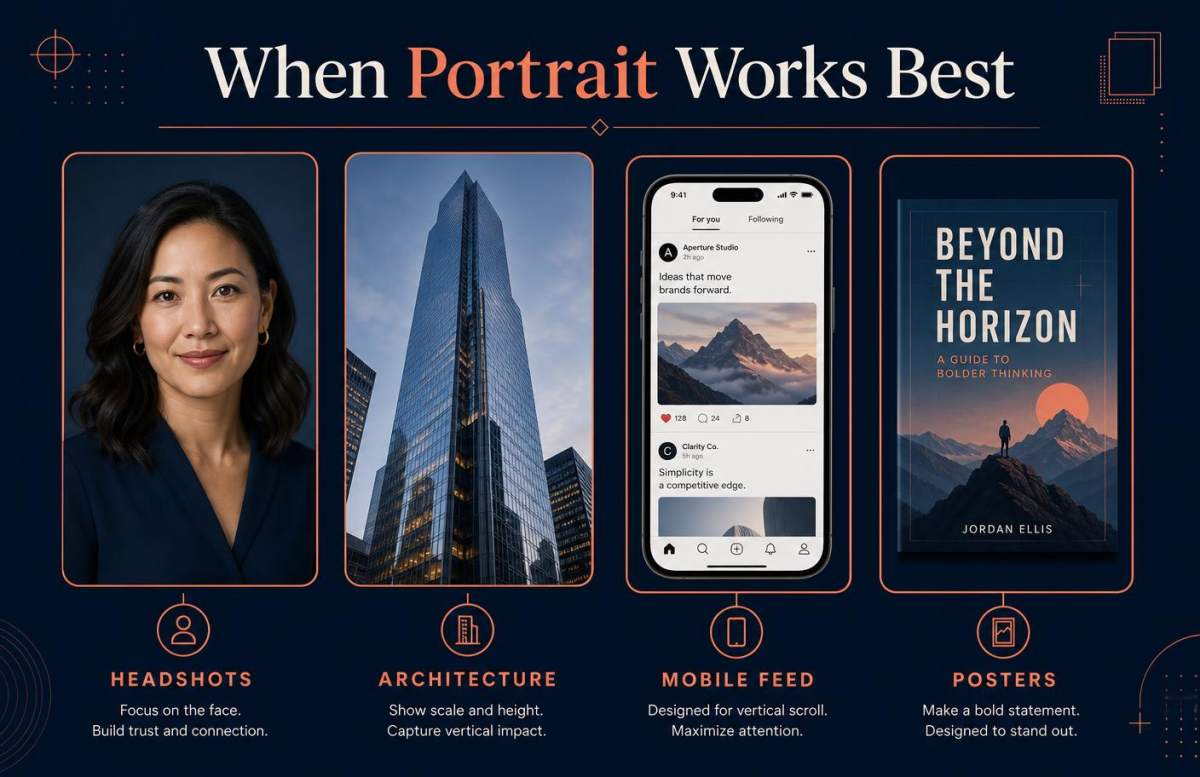
You should use portrait orientation when your subject is taller than it is wide, or when you're creating content for platforms where vertical viewing is the standard. This format suits close-up subjects, tall structures, and any content built for phone screens.
Headshots, Portraiture, and Close-Up Shots
Portrait orientation is the standard choice for headshots and portrait photography. It frames a person's face and upper body without wasted space on the sides.
Close-up shots of a single subject also work well in this format. Think of a flower, a hand, or a detailed product shot. The vertical frame keeps your viewer's eye locked on the main subject.
Portrait shots remove background clutter that a wider frame would include. This makes them a common pick for:
- Professional headshots
- Social media profile photos
- Book covers
- Posters
Most phone cameras default to portrait mode for a reason. It matches how people naturally hold their devices when taking a photo of another person.
Fashion, Street, and Architectural Photography
Fashion photography often relies on portrait orientation to capture a model from head to toe. This shows the full outfit, body shape, and posture in one frame. You'll see this format used heavily in magazines and online fashion catalogs.
Street photography also benefits from vertical framing. It can isolate a single person walking, a doorway, or a narrow alley without pulling in distracting elements from either side.
Architecture and tall natural subjects like trees are strong candidates for portrait shots. A building's height or a tree's trunk and canopy show up better when your frame runs vertical instead of horizontal.
Vertical Content for Mobile Screens
Mobile-first platforms have made portrait orientation the default for a lot of social media content. Instagram Stories, Instagram Reels, and TikTok all display video and photos in a vertical frame.
If you shoot in landscape for these platforms, your content gets cropped or shrunk with black bars on the sides. Shooting in portrait avoids this problem entirely. When you already have a horizontal shot you need to publish vertically, our Instagram image resizer can extend the frame to fit the vertical placement.
Vertical formatting also fills more of the screen on a phone, which most viewers use to scroll through their feeds. This makes your content take up the full display without extra effort from the viewer.
When Landscape Orientation Works Best
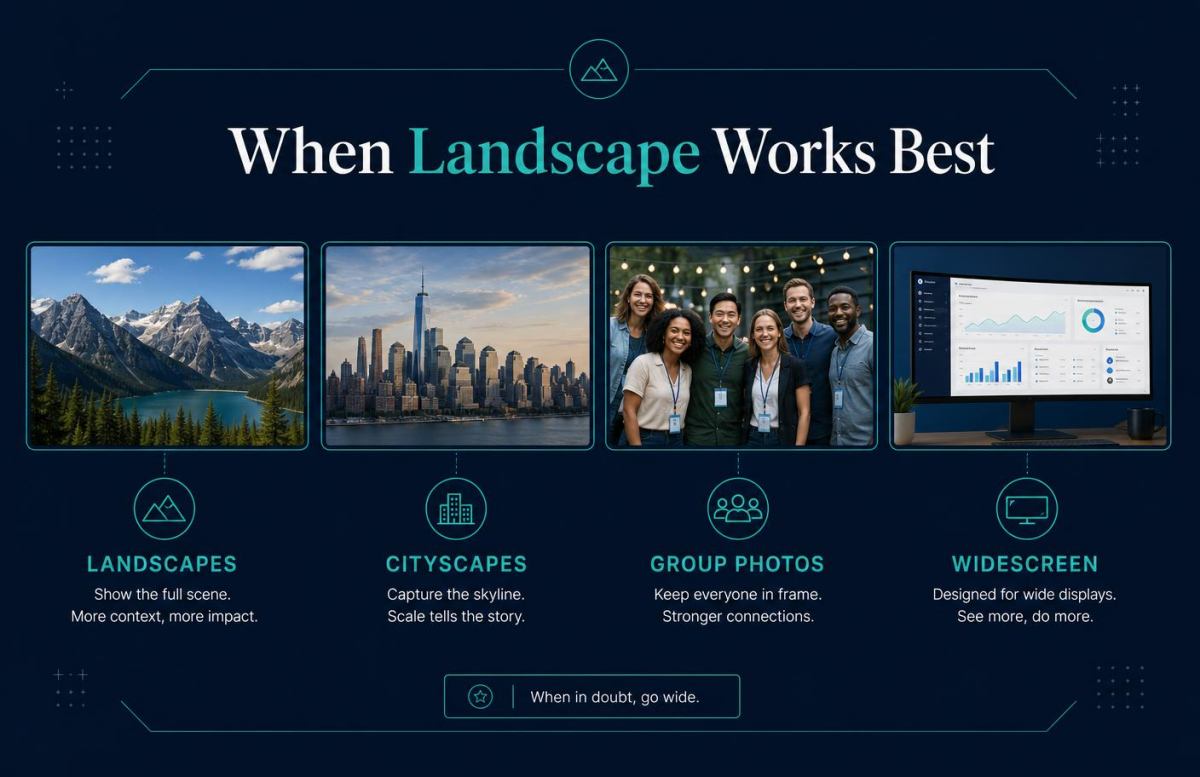
Landscape orientation gives you a wide field of view. This makes it the better choice for wide scenes, group shots, and video content that people watch on horizontal screens.
Scenery, Panoramic Views, and Cityscapes
When you shoot landscape photography, horizontal orientation is almost always the right call. Wide scenes need room to breathe, and landscape format gives you that space.
Mountains, fields, and coastlines look more natural in a horizontal frame. This is because your eyes scan side to side, not up and down. A landscape scene matches how you naturally view the world around you.
Cityscapes also work well in this format. You can fit tall buildings, wide streets, and skylines into one frame without cutting off important parts of the scene.
Panoramic views are another strong match for landscape mode. Many cameras and phones include a panoramic setting built specifically for this kind of wide shot.
Group Photos, Events, and Action
Group photos need extra width to fit everyone in frame. Landscape orientation gives you that width without forcing people to squeeze together or stand in awkward rows.
This makes it a common choice for event photography. Weddings, parties, and conferences often involve large groups of people in one shot.
Action shots also benefit from horizontal orientation. Sports and movement need space on both sides of the subject to show speed and direction.
If you shoot a runner or a car in motion, landscape format gives the subject room to move within the frame. This helps the image feel more dynamic and complete.
Wide Video, Websites, and Presentations
Most video platforms are built for horizontal viewing. YouTube videos, for example, display best in landscape format on both computers and TVs. When you build thumbnails for those videos, our YouTube thumbnail resizer keeps them at the correct 16:9 landscape ratio.
Cropping video to fit portrait screens can cut off important visual details. Wide video keeps the full scene visible, which matters for storytelling and clarity.
Websites also rely on horizontal orientation. Most desktop screens are wider than they are tall, so landscape images fit more naturally into web layouts. The same is true for social headers and banners, like a Facebook cover photo or a Twitter banner, which both use wide landscape dimensions.
The same applies to presentations. Slides are almost always designed in horizontal orientation to match projector and screen dimensions.
Even Facebook supports landscape video and images well, especially for content viewed on larger screens rather than mobile feeds.
Choosing an Orientation for the Final Use
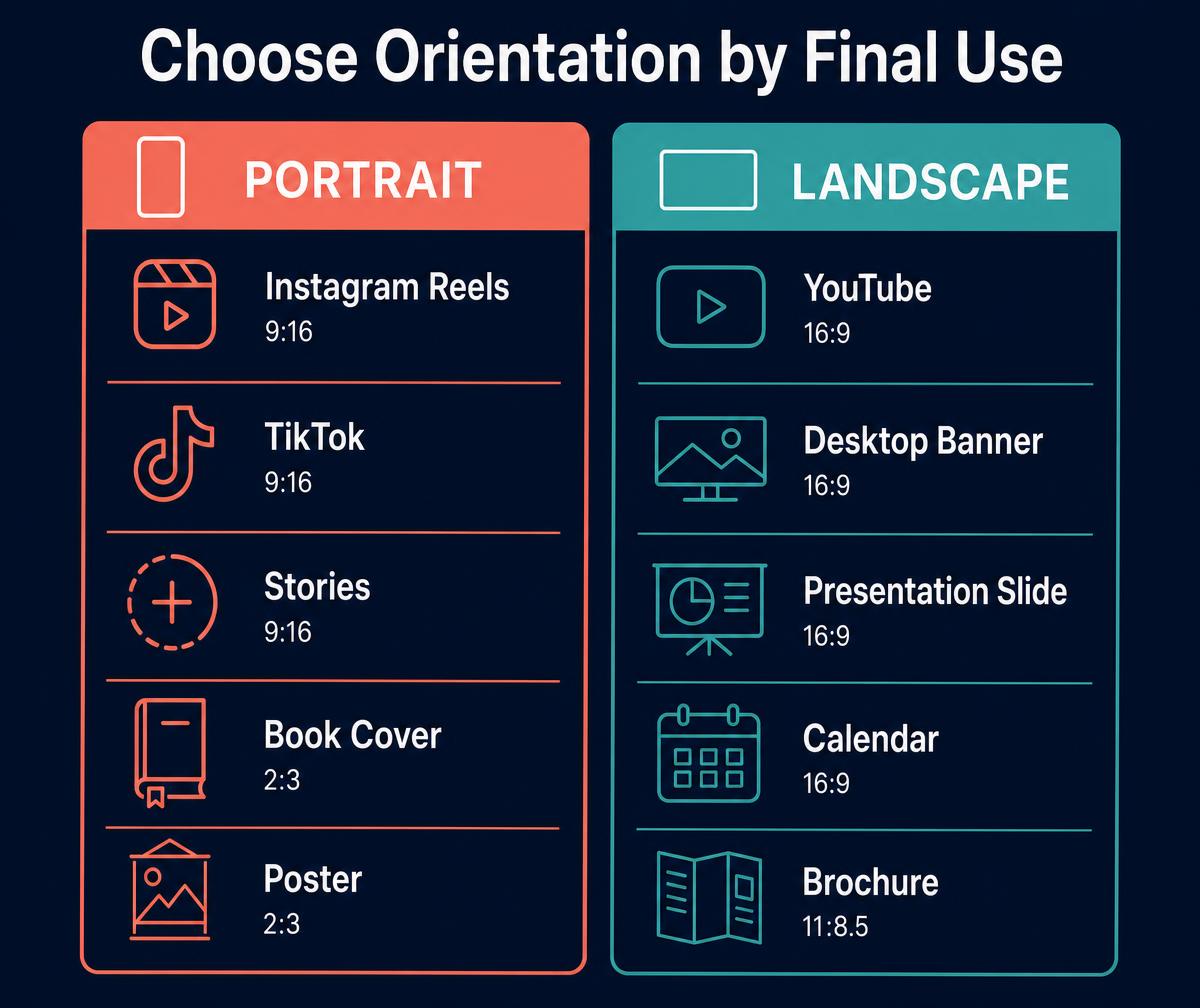
Your choice between portrait and landscape should match where the image will end up, not just how it looks in the moment. Social media feeds, printed materials, and future editing needs all call for different shapes.
Planning for Social Media Platforms
Most social platforms are built for phones, so vertical images often perform better.
Instagram feed posts work well in a 4:5 ratio, while Instagram Stories need a full 9:16 vertical frame. TikTok is built entirely around vertical video, so landscape clips get cropped or shrunk with black bars on the sides.
Facebook and LinkedIn are more flexible and display both orientations cleanly in the feed. YouTube is the main exception, since standard videos are still landscape, though YouTube Shorts follow the vertical format.
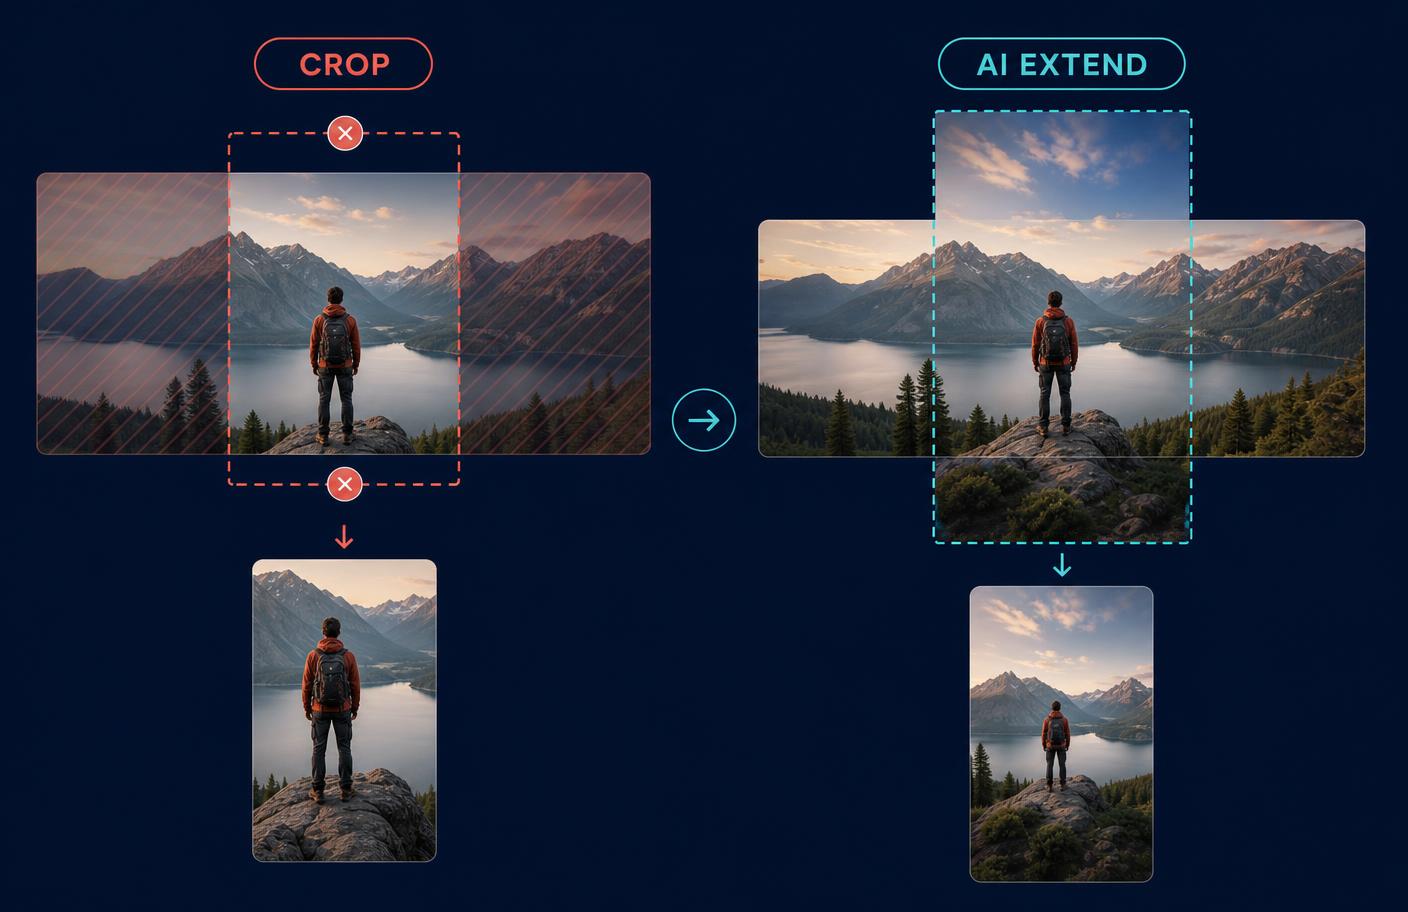
If you're creating social media content for multiple mobile-first platforms, shoot vertical first. You can always crop a portrait image down, but you can't add missing pixels to a landscape shot to make it vertical — unless you use an AI tool that generates the extra space for you. Our guide to Facebook image sizes and visual trends covers the exact dimensions each placement needs.
Matching Print and Design Layouts
Print projects follow their own rules, and orientation is often decided by the object itself.
Posters are usually vertical because they're meant to be viewed at eye level on a wall or door. Book covers almost always use portrait orientation to match the shape of the printed book.
Landscape works better for items like calendars, wide banners, or brochures that open horizontally. Before you shoot or design, check the final print size and orientation required by the printer or publisher.
Matching the shot to the layout from the start saves you from stretching, squeezing, or cropping out important details later.
Capturing Flexible Cropping Options
Shooting with future editing in mind gives you more options down the line.
Cropping a landscape photo into a portrait shape, or the reverse, often cuts off parts of the image you need. To avoid this, leave extra space around your subject when you shoot, so a crop tool has room to work without cutting into the main subject.
Keeping the original aspect ratio in mind also matters if the image needs to appear in multiple sizes across different platforms. If you don't have room to crop from, an AI image extender can generate matching background on the sides or top so one photo can serve several formats without a reshoot.
Turn One Orientation Into Another Without Cropping
Here's the practical problem that trips up most creators: you shot landscape, but you need vertical for Stories — or you shot a tight portrait, but the website banner needs to be wide. Cropping means losing part of your subject, and rotating leaves empty bars you have to fill.
This is exactly what AI outpainting solves. Instead of cutting into your image, the PixExtender AI image extender generates realistic new background on the missing sides, converting a landscape shot into a portrait frame (or the reverse) while keeping your subject fully intact.
- Turn a horizontal photo into a 9:16 vertical for Reels, Stories, or TikTok.
- Widen a tight portrait into a landscape banner for your website or slides.
- Fill the empty space left behind after rotating an image.
One source photo can then serve every placement without a reshoot or an awkward crop. The full method-by-method breakdown lives in How to Change the Aspect Ratio of a Photo.
Shooting and Editing for Better Results
Getting the right shot often means making decisions both before and after you press the shutter. Small choices about framing, cropping, and post-processing can make a big difference in how your final image looks.
Shoot Both Formats When the Choice Is Unclear
If you're not sure which camera orientation fits a scene, take both. Shoot a horizontal frame and a vertical frame of the same subject before you move on.
This gives you options later, especially if you don't know yet where the photo will be used. A shot meant for a magazine spread might need landscape mode, while the same image for a phone screen works better in portrait mode.
Adjust your ISO and exposure settings as needed for each orientation, since changing the frame can also change how light falls across the scene. Testing both formats takes only a few extra seconds but can save you from reshooting later.
Leave Space for Crops and Text
Always leave extra space around your subject when you shoot. This gives you room to crop later without cutting off important details.
Think about composition and framing before you shoot, not just after. If you're working on a website banner, brochure, or photo essay, you may need blank space for a headline or caption.
A tight crop might look great as a single image, but it limits your options for later use. Leaving margin on the sides or top of the frame keeps your composition flexible. And if you didn't leave enough margin, an AI image extender can add that space after the fact.
Correct Rotation and Refine the Final Frame
Once you've selected your best shot, check that horizontal and vertical lines are straight. A tilted horizon or crooked building can distract from an otherwise strong photo.
Most editing programs include tools to rotate and align your image with a grid. This step matters for both portrait photography and landscape photography, since crooked lines are more noticeable in wide or tall frames.
After straightening, use cropping to remove any extra space you no longer need and refine your subject's position. Small adjustments here can improve the balance of your final image.
Frequently Asked Questions
Choosing between portrait and landscape orientation affects how your subject looks, how well it fits on a screen, and how it prints. Here are answers to common questions about orientation, aspect ratios, and how to switch between the two formats.
What is the difference between portrait and landscape orientation?
Portrait orientation means your image is taller than it is wide. Landscape orientation means your image is wider than it is tall.
The main difference comes down to which direction the frame is longer. Portrait works well for subjects with more height, like a person or a tall building. Landscape works well for wide scenes, like a mountain range or a group of people standing side by side.
Is portrait orientation vertical or horizontal?
Portrait orientation is vertical. This means the top and bottom edges of your image are shorter than the left and right edges.
A simple way to remember this is to think about an ID photo. Every ID photo is taken in portrait mode, which makes the image vertical instead of horizontal.
When should I use portrait instead of landscape?
Use portrait orientation when your subject is taller than it is wide. This includes close-up portraits, full-body shots, and tall buildings.
Portrait mode also works well for content made for phones. Apps like Instagram Stories and TikTok are built for vertical video content, so shooting in portrait avoids awkward cropping later.
Which orientation is better for printing photos?
Neither orientation is better overall. Your choice should match the shape of your subject.
If you're printing a photo of a person or a tall object, portrait orientation gives you a more balanced print. If you're printing a wide scene, like a landscape or a group photo, landscape orientation works better because it captures more of the width without cutting off important parts of the image.
What aspect ratio is commonly used for portrait and landscape images?
Common aspect ratios include 4:3, 3:2, and 16:9, and these can be used in either orientation. A 16:9 ratio in landscape mode is standard for widescreen video, while the same ratio flipped to portrait mode works for vertical video on phones.
For printing, 4:5 is a popular portrait ratio for framed prints and social media posts. 3:2 is a common choice for both portrait and landscape prints because it matches standard photo paper sizes.
How do I change a photo from portrait to landscape orientation?
For photos, most editing apps let you rotate the image 90 degrees to switch orientation. Keep in mind that rotating a photo can leave empty space at the top and bottom or the sides, depending on the original composition, so you may need to crop it after rotating. To avoid losing your subject to a crop, an AI image extender can fill that empty space with matching background instead.
Pick the Orientation, Not the Compromise
Portrait or landscape is really a question about your subject and your destination: tall subject and phone screen means vertical, wide scene and desktop or TV means horizontal. When you know the answer before you shoot, everything downstream gets easier.
And when the answer changes after the shoot, you don't have to crop your way out of it. Try it free with PixExtender's Image Enlarger → PixExtender.com
Converting a whole shoot to a new orientation? The Batch Extender reshapes up to 20 images in one run.