What Is an Image Stretcher?
An image stretcher is a digital tool that changes an image's dimensions by expanding or compressing it along one or both axes. These tools let you modify height and width independently or together to fit specific requirements.
Definition and Core Functionality
An image stretcher is software that allows you to stretch an image by adjusting its height and width values. You can stretch images horizontally or vertically to create new dimensions that match your needs.
The tool works by modifying pixel distribution across the canvas. When you upload the image you want to stretch, the stretcher will automatically stretch the image based on your input values.
Most tools let you enter specific pixel dimensions or use adjusting the percentage to customize the size. You can drag corners or sides to change its dimensions manually, or type exact numbers into input fields.
An online image stretcher typically supports common formats like PNG and JPEG. These free online tools process your image through a browser without requiring downloads or installations.
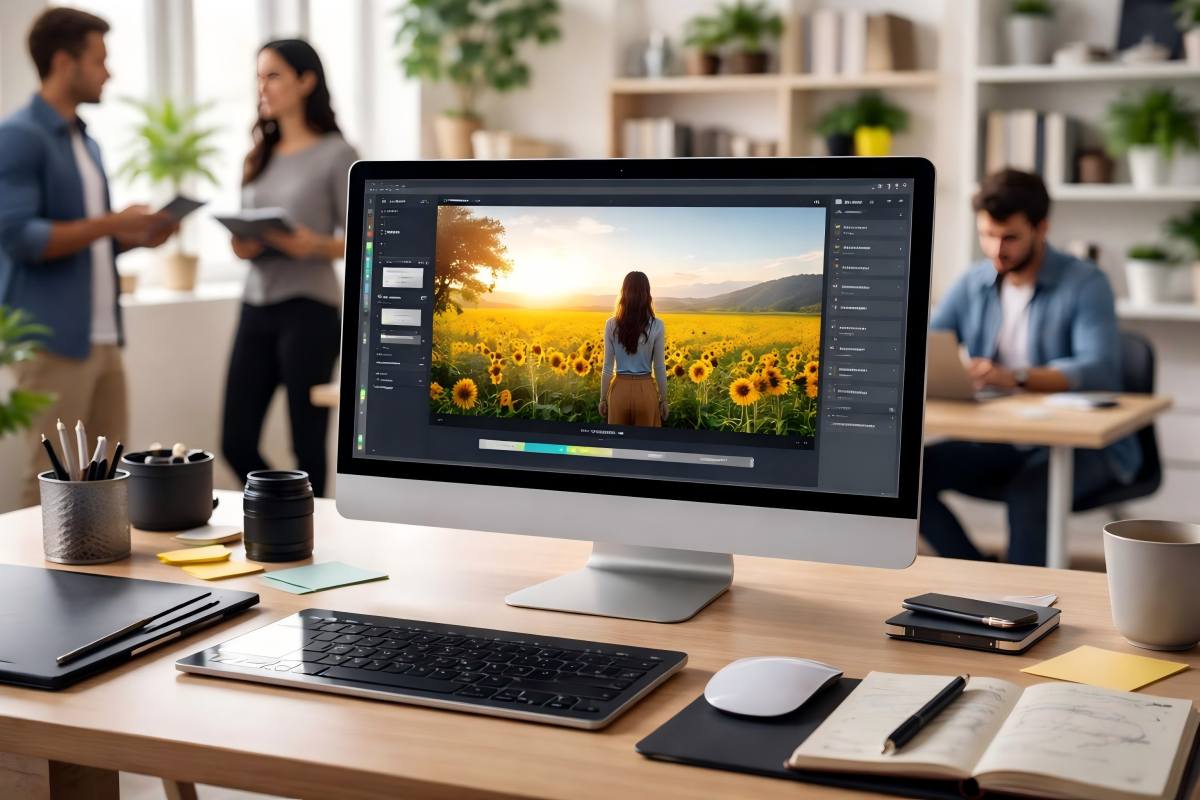
Some advanced tools, such as AI image extenders, use AI algorithms to improve quality during the stretching process.
Difference Between Stretching and Resizing photos online
Resizing maintains the aspect ratio by scaling height and width proportionally together. When you resize an image, both dimensions change at the same rate to prevent distortion.
An image resizer locks proportions by default. Stretching lets you modify dimensions independently without maintaining their original aspect ratio.
You can stretch the image along one axis while keeping the other unchanged. This creates intentional distortion to fit specific layouts or create visual effects.
A photo stretcher gives you control over whether to keep proportions locked or unlocked. Many tools include a toggle that lets you switch between proportional scaling and free stretching.
This flexibility helps when you need to stretch photos to fit pre-made sizes for social media posts or other platforms.
Common Use Cases
You might need to stretch images to fit specific platform requirements on websites or social media. Different platforms demand particular dimensions, and stretching helps achieve these sizes without losing content.
E-commerce sites often require product images in exact dimensions that don't match original photo ratios. Graphic designers use image stretchers to create memes or intentional visual effects.
Background images frequently need horizontal stretching to span wide page layouts. You can easily stretch banner images or headers to match website width requirements.
Photographers sometimes want to stretch photos to correct perspective issues or create artistic effects. A batch image resizer lets you stretch multiple images at once when working with large collections.
The tool is useful for adjusting dimensions without distorting key subjects when used carefully with aspect ratio controls.
How to Stretch an Image Using Online Tools
Online image stretchers provide quick access to resize tools through your browser without installing software. You can upload images using drag and drop or file selection, adjust dimensions through percentage sliders or specific pixel values, and save your stretched results in common formats like PNG or JPEG.
Upload and Drag and Drop Methods
Most online image stretchers offer two primary ways to get started with your image. You can click the upload button to browse files on your device and select the image you want to stretch.
Drag and drop provides a faster alternative where you simply drag your image file directly into the browser window. The drag and drop method works by hovering your image file over the designated upload area until you see a visual indicator.
Release your mouse button to automatically upload the image. This approach saves time when you need to stretch multiple images in succession.
Many tools support batch image processing through drag and drop. You can select several files at once from your folder and drop them into the upload zone.
The image stretcher will process each file according to your settings, allowing you to resize pictures efficiently without repeating steps for each individual file.
Choosing Dimensions and Aspect Ratios
After uploading, you'll see options to customize the size of your stretched image. You can enter specific pixel dimensions for height and width, or use percentage sliders to change its dimensions proportionally.
Some online image stretchers provide preset options for common social media posts and platform requirements.
Common dimension input methods include:
- Percentage adjustment - Increase size by 150%, 200%, or custom values
- Pixel values - Enter exact height and width measurements
- Pre-made sizes - Select from templates for Instagram, Facebook, YouTube
- Aspect ratio lock - Maintain original proportions or stretch horizontally or vertically independently
The aspect ratio setting determines whether your image stretches uniformly or in one direction. Locking the aspect ratio prevents distortion by keeping the relationship between height and width consistent.
Unlocking it allows you to stretch an image horizontally without affecting its vertical size, useful for fitting images to fit specific layouts.
Saving and Downloading the Stretched Image
Once you've adjusted your dimensions, click the download or save button to save your stretched image. Most tools let you choose between PNG and JPEG formats before downloading.
PNG maintains higher image quality with transparency support, while JPEG creates smaller file sizes. Some online image stretchers show a preview before you finalize the download.
This lets you verify the stretched result meets your requirements without losing quality or clarity. If the output shows unwanted distortion, you can adjust your settings and regenerate the image.
The download process typically takes seconds for standard images. Your browser will save the file to your default downloads folder, or prompt you to choose a location.
Many tools preserve your original filename with added indicators like "_stretched" or "_resized" to help you organize your files.
Maintaining Quality When You Stretch an Image
Stretching images without quality loss requires specific techniques that protect important details while expanding canvas space. The right approach depends on whether you need to preserve original proportions, avoid visible distortion, or maintain resolution for print and digital use.
Lossless Stretching Techniques
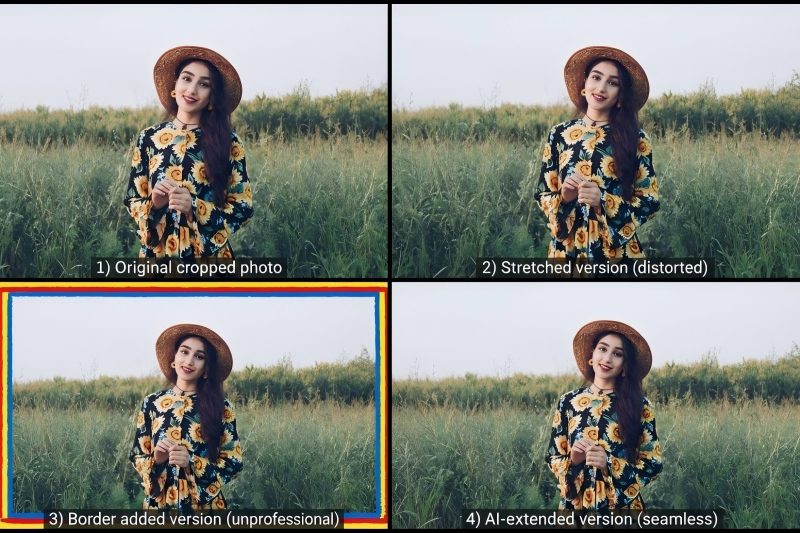
Content-Aware Scale in Photoshop analyzes your image's pixel patterns to intelligently stretch backgrounds while protecting key subjects. You can create an alpha channel or selection to lock faces, logos, or products in place while the tool expands less important areas.
AI-powered image stretcher tools use generative fill to add new pixels that match your photo's existing textures and lighting. These tools work well when you want to stretch images horizontally or vertically for social media posts or banner layouts.
Before using any photo stretcher, duplicate your original layer so you can compare results. For batch processing, some online image stretcher platforms let you stretch multiple images with consistent settings.
Upload the image you want to stretch, select your protection zones, and the stretcher will automatically stretch the background without touching critical elements.
Avoiding Image Distortion
Keep proportions locked when you resize image dimensions to prevent squashed or elongated results. Most image resizer tools include a chain-link icon that maintains aspect ratio as you adjust height and width.
To stretch an image horizontally without distorting subjects:
- Expand canvas width first using the crop tool
- Apply Content-Aware Scale with subject protection enabled
- Use Generative Expand to fill empty edges with AI-matched content
- Check for repeated patterns or unnatural seams at 100% zoom
Manual stretching by dragging corners will always cause distortion. A free online image stretcher with smart algorithms prevents this by analyzing which pixels can safely expand.
When you need to stretch an image for specific layouts, add extra canvas space rather than forcing existing pixels to stretch beyond their natural limits.
Optimizing Image Resolution
Start with the highest resolution source file available before any stretching. An image stretcher tool can't add detail that wasn't captured originally, but it can preserve what exists.
For print work, maintain at least 300 DPI after stretching. Check your image's height and width in pixels, then divide by your target print dimensions.
If the result drops below 300, you'll see quality loss in the final output. Web images need less resolution but benefit from selective sharpening after you stretch the image.
Apply a high-pass filter only to original content areas, not AI-generated edges. Export stretched images as PNG for graphics with text or sharp lines, since this format prevents compression artifacts that JPEG introduces.
Online tools that resize and stretch an image often include preset sizes for common platforms. These maintain image quality by calculating optimal pixel dimensions automatically.
Customizing Image Stretching Options
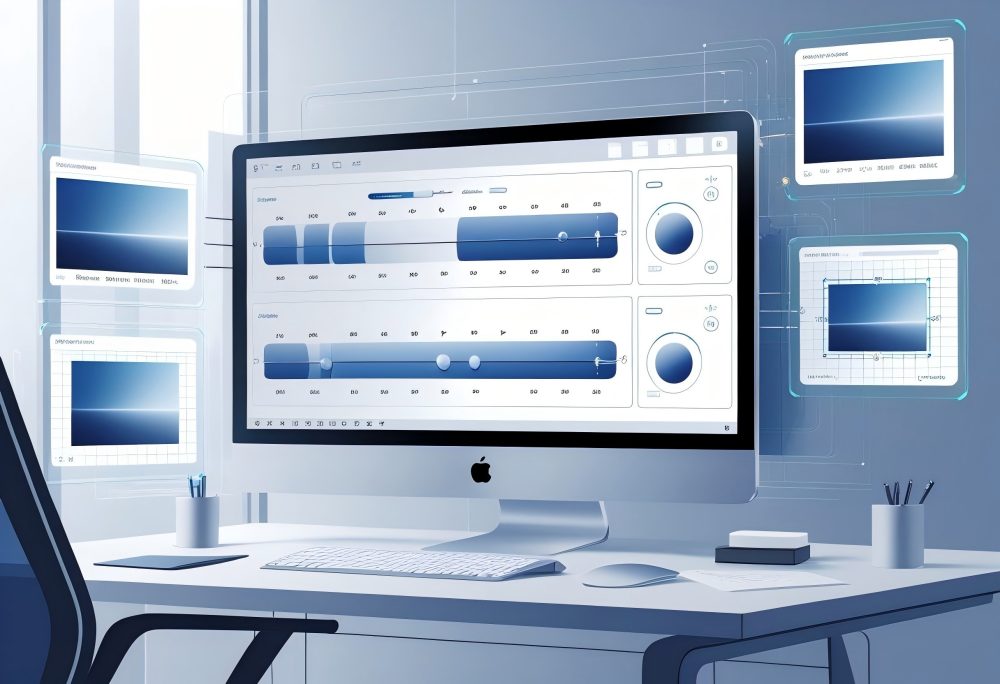
Image stretcher tools offer several ways to adjust dimensions based on your specific needs. You can stretch horizontally or vertically, set exact measurements, or adjust by percentage to achieve the precise size you want.
Stretching Horizontally vs. Vertically
You can stretch an image in one direction without affecting the other. When you stretch horizontally, you widen the image along its width while keeping the height the same.
This works well when you need to fit an image into a wider space or create a panoramic effect. Vertical stretching increases the image's height without changing the width.
This option helps when you need taller images for specific layouts or social media posts with vertical formats. Most image stretcher tools let you choose which direction to stretch.
Some platforms like Picsart allow you to stretch images horizontally or vertically independently, giving you full control over each dimension. You can also stretch the image in both directions at once, though this may cause distortion if you don't maintain the aspect ratio.
Common uses for directional stretching:
- Horizontal stretching: Banners, headers, wide social media formats
- Vertical stretching: Stories, mobile displays, tall graphics
- Both directions: Full canvas fills, background images
Setting Specific Width and Height
You can set exact pixel dimensions when you need precise measurements. This method works best when you have specific requirements for width and height, such as when uploading the image you want to resize for websites or digital platforms.
Enter the desired width and height values directly into the tool. For example, if you need a 1200 x 628 pixel image for social media, you input these specific pixel dimensions.
The image stretcher will automatically stretch the image to match your measurements. Keep in mind that setting specific dimensions without maintaining the aspect ratio can distort your image.
If your original image is 800 x 600 pixels and you resize to 1200 x 400 pixels, the image will appear compressed vertically. Lock the aspect ratio if you want to avoid this issue.
Most tools let you see a preview before finalizing. This helps you check whether the stretched version looks right or if you need to adjust the dimensions.
Resizing by Percentage
Percentage-based resizing scales your image proportionally. When you increase by 150%, both the width and height grow by that amount while maintaining their original aspect ratio.
This prevents distortion and keeps your image looking natural. You simply set a percentage value instead of specific measurements.
A free online image stretcher typically offers a slider or input field where you enter the percentage. Values above 100% enlarge the image, while values below 100% shrink it.
This method works well when you don't know the exact dimensions you need but want to make the image larger or smaller. For instance, if you want to stretch an image by 200%, the tool doubles both dimensions automatically.
Adjusting the percentage gives you quick results without calculating specific pixel values.
Percentage ranges and their effects:
- 50-99%: Reduces image size
- 100%: Original size (no change)
- 101-200%: Moderate enlargement
- 201%+: Significant enlargement (may reduce image quality)
Advanced Features of Modern Image Stretchers
Modern image stretchers have moved far beyond basic resize tools. They now offer AI-powered technology that understands image content, batch processing for multiple files at once, and smart protection for important parts of your photos.
Content-Aware and AI-Powered Stretching
AI image stretcher technology uses advanced algorithms to understand what's in your photo before making changes. The tool recognizes faces, objects, and backgrounds to stretch images without distorting important details.
When you stretch an image horizontally or vertically, the AI automatically adjusts different areas at different rates to maintain natural proportions. Content-aware stretching protects key subjects while expanding empty space around them.
If you want to stretch a photo with a person in it, the AI keeps the person's proportions normal while expanding the background. This prevents the stretched look that makes images appear unrealistic.
The technology analyzes pixel patterns and textures to fill expanded areas intelligently. Instead of simply pulling existing pixels apart, AI generates new content that matches surrounding areas.
Batch Processing and Multiple Images
Batch image processing lets you stretch multiple images at the same time with identical settings. This feature saves hours when you need to resize pictures for a website or social media posts.
You can upload dozens of files, set your desired dimensions, and process everything in one click. Most online image stretcher tools with batch features let you:
- Upload multiple formats including PNG and JPEG files simultaneously
- Apply consistent dimensions to ensure uniform sizing across all images
- Maintain aspect ratio settings for all files in the batch
- Download results as individual files or a compressed folder
The free online tool approach means you don't need to install software to stretch your photos online quickly. You simply upload the images you want to stretch, customize the size parameters, and let the stretcher automatically stretch the image batch.
This works especially well for e-commerce stores that need to resize an image collection to fit specific platform requirements.
Protecting Subjects and Backgrounds
Modern image stretcher tools offer selective stretching that protects important areas while expanding others. You can mark regions that should stay at their original dimensions while the rest of the image expands.
This prevents your main subject from looking stretched or unnatural. Protection features include:
- Subject detection that automatically identifies people, products, or focal points
- Manual masking tools to mark areas you want to protect
- Edge preservation that keeps borders sharp without distortion
- Background expansion that stretches empty space without affecting foreground elements
When you stretch and resize an image this way, the tool treats different zones separately. The image's height and width change without distorting the parts that matter most.
You can easily stretch images to fit any platform dimensions without losing image quality in critical areas.
Aspect Ratio, Proportions, and Cropping Strategies
Stretching an image without ruining its look depends on how you handle aspect ratio and when you decide to crop. Understanding proportions helps you avoid distortion, while smart cropping ensures your final dimensions fit platform requirements without squashing your subject.
Using Keep Proportions
When you resize an image, most tools offer a "keep proportions" toggle—often shown as a chain or lock icon. This feature links width and height so changing one dimension automatically adjusts the other to maintain the original aspect ratio.
Keeping proportions prevents your image from looking stretched or squashed. If you upload a square photo and want to make it wider, the tool will increase height proportionally.
This approach works best when you need to scale up or down without adding extra canvas space. Some image stretcher tools let you unlock proportions intentionally.
You might do this when preparing backgrounds that will be filled by AI or when you plan to crop afterward. Most users should leave the lock enabled to preserve image quality and avoid distortion.
When to Crop Before or After Stretching
Cropping before you stretch images helps you remove unwanted edges and focus on your subject. This strategy works well when your original photo has extra space you don't need.
You can crop to a specific pixel dimension or aspect ratio, then resize the trimmed image to your target size. Cropping after stretching makes sense when you're using an AI image stretcher to add background.
Stretch your image first to generate extra canvas, then crop to fit platform requirements. This method is useful for social media posts that demand specific sizes without losing your main subject.
Most photo editing tools let you combine both approaches. Crop out distractions first, resize the image while keeping proportions locked, then make a final crop to match preset dimensions like 1080×1080 for Instagram or 1200×630 for Facebook.
Matching Platform Requirements
Different platforms require different aspect ratios and dimensions. Instagram favors 1:1 squares and 4:5 vertical posts, while YouTube thumbnails need 16:9 rectangles at 1280×720 pixels minimum.
Knowing these requirements before you stretch an image saves time and avoids quality loss from repeated resizing. Use an image resizer with pre-made sizes or enter height and width manually to hit exact specs.
Many online image stretcher options include presets for common platforms, so you can select "Instagram Story" instead of calculating 1080×1920 yourself. When your original doesn't match the target ratio, decide whether to stretch and crop or to extend with AI.
Stretching without distortion requires you to either add padding or trim content. An image stretcher tool with aspect ratio locking ensures you won't accidentally warp faces or text while adjusting dimensions to fit any platform.
Supported File Formats and Privacy Considerations
An image stretcher supports major file types like JPG, PNG, BMP, and WEBP, making it easy to stretch images regardless of how they were saved. Most online tools require no downloads and protect your data through encryption and secure processing.
Popular Image File Types
An image stretcher typically works with JPG, PNG, BMP, and WEBP formats. JPG files are compressed and ideal for photos with lots of colors.
PNG files support transparency and work well for graphics with sharp edges or text. WEBP is a newer format that balances quality and file size efficiently.
BMP files are uncompressed and take up more space but preserve every pixel. Most free online image stretcher tools automatically detect your file type when you upload the image you want to stretch.
You don't need to convert files before using an online image stretcher. The maximum file size varies by tool but usually ranges from 5 MB to 10 MB.
If your image exceeds this limit, you can resize it first or use a tool that supports larger uploads.
Online Security and Data Protection
Your uploaded images are encrypted during transfer to protect them from unauthorized access. Reputable image stretcher platforms don't sell your personal information or share your files with advertisers.
The tool processes your images on secure servers and typically deletes them within 24 hours after you finish editing. Some platforms collect upload metadata like file names, dimensions, and formats to improve their service.
You can review their privacy policy to see exactly what data they gather. Payment information goes through secure processors that don't store full card numbers.
Session cookies keep you signed in and remember your preferences without tracking the content of your images. You can delete your projects or request full account deletion if you create an account, and your data gets removed within 30 days.
No Software or Plugin Needed
A free online image stretcher runs directly in your web browser without downloads or installations. You simply upload your image, adjust the dimensions, and save the result.
This eliminates compatibility issues across different operating systems. Your device doesn't need extra storage space for software files or updates.
The tool works on Windows, Mac, iOS, and Android devices as long as you have internet access. You can stretch images easily from any location without waiting for program installations or dealing with plugin errors.
Browser-based tools automatically update with new features and security patches. You get access to the latest editing features without manual updates or version management.
Frequently Asked Questions
These common questions cover the practical aspects of stretching images, from selecting the right tools to maintaining quality across different platforms and devices.
What tools can I use to stretch an image without distortion?
Several tools offer distortion-free image stretching. CapCut uses advanced AI algorithms to stretch images while preserving their natural appearance.
The software analyzes your image content and expands it intelligently rather than simply pulling pixels apart. Fotor provides an online image stretcher that maintains quality during the stretching process.
You can stretch images horizontally or vertically without distorting important details. Picsart gives you precise control over how your image stretches.
The platform lets you adjust specific dimensions while keeping the aspect ratio locked to prevent unwanted distortion. InsMind applies AI technology to understand which parts of your image need careful handling during stretching.
This prevents important elements from becoming warped or unnatural-looking.
How can artificial intelligence assist in resizing images accurately?
AI image stretcher tools analyze the content of your photos before making changes. These advanced AI algorithms identify important subjects, backgrounds, and edges within your image.
The technology then applies intelligent stretching that preserves key elements while expanding the canvas. When you upload the image you want to stretch, AI tools automatically stretch the image by filling in new pixels based on surrounding content.
This creates more natural results than traditional methods that simply duplicate existing pixels. The AI can distinguish between areas that can safely expand and regions that need protection from distortion.
For example, faces and text remain clear while background areas stretch smoothly to fill the desired size.
What are the best practices for using an online platform to stretch images?
Start with the highest quality image you have available. Higher resolution source files give the image stretcher tool more data to work with, resulting in better final output.
Choose your target dimensions carefully before you begin. Most online tools allow you to stretch images by adjusting the percentage or entering specific pixel dimensions for both height and width.
Lock the aspect ratio if you want to maintain proportions. This prevents your image from looking unnaturally wide or tall.
Unlock it only when you specifically need to stretch an image horizontally or vertically. Preview your results before downloading.
Check corners and edges where distortion is most likely to appear. Save your stretched image in PNG format when you need to preserve quality.
Use JPEG when file size matters more than maximum clarity.
Are there ways to horizontally stretch an image while maintaining aspect ratio?
You cannot stretch an image horizontally while keeping the aspect ratio unchanged. The aspect ratio represents the relationship between width and height, so changing one dimension requires changing the other proportionally.
If you want to stretch your image horizontally, you must unlock the aspect ratio setting. This allows you to change the width independently from the height.
Some tools offer content-aware stretching that adds pixels to less important areas. This lets you broaden your image width while protecting key subjects from distortion.
The stretcher will automatically stretch background areas while keeping focal points properly proportioned. For social media posts that need specific dimensions, use preset sizes instead.
These pre-made sizes adjust your image to fit any platform requirements without manual stretching.
Is it possible to stretch an image on an iPhone, and what app would be recommended?
You can stretch photos on your iPhone using the built-in Photos app. Open your image, tap Edit, then use the crop tool to adjust dimensions.
Drag the corners to resize the image to your desired size. CapCut offers a mobile version with powerful AI expand features.
Download the app, import your photo, and use the AI tools to stretch your photos without losing quality or clarity. Fotor provides a free online tool that works through your iPhone's browser.
You don't need to download anything. Simply upload your image through Safari, adjust the stretching level, and save the results.
Picsart gives you a user-friendly mobile app with advanced editing features. You can easily stretch images and customize the size with precise controls for both horizontally and vertically adjustments.
How can I use Canva to resize a photo for a specific design without losing quality?
Open Canva and create a new design with your target dimensions. Upload the image to your Canva project by clicking the Upload button in the left sidebar.
Drag your image onto the canvas. Canva automatically scales it to fit the design space.
Click on the image to reveal corner handles. Hold Shift while dragging a corner to maintain proportions as you resize.
Without holding Shift, you can stretch the image freely to fill your canvas dimensions. Use Canva's position tools to center your stretched image perfectly.
The platform provides alignment guides that help you place elements precisely. For batch image processing, create one design and then use Canva's resize feature.
Download your final image by clicking the download button. Select PNG for high-quality results or JPEG for smaller file sizes.